先日のContainer Runtime Meetup #3で「Podmanでkind動かせるよ」という話になり、どういうわけか「Podmanではkindは(まだ)動かせない」と思い込んでいたため、実際に試してみました。
ドキュメントは多分ないですが、 sudo KIND_EXPERIMENTAL_PROVIDER=podman kind create cluster を実行するとpodmanでkind create cluster できます。
— Akihiro Suda (@_AkihiroSuda_) 2021年1月28日
(少し前にRHEL環境で仕事してて動作確認用のKubernetesクラスタが必要になった時に「RHELだとDocker使えなくてPodmanになるけどそうするとkind使えないのでマネージドK8s使いましょう!」なんて言ってしまってスミマセン)
ちなみに、Docker Composeについては、Podman ver3.0から使える見込みのようです。
環境
[zaki@rhel8 ~]$ uname -a
Linux rhel8 4.18.0-240.10.1.el8_3.x86_64 #1 SMP Wed Dec 16 03:30:52 EST 2020 x86_64 x86_64 x86_64 GNU/Linux
[zaki@rhel8 ~]$ cat /etc/redhat-release
Red Hat Enterprise Linux release 8.3 (Ootpa)
- Podman 2.0.5
- kind 0.9.0
- MetalLB 0.9.5
- Istio 1.8.2
Podmanのインストール
[zaki@rhel8 ~]$ sudo dnf install podman
Updating Subscription Management repositories.
メタデータの期限切れの最終確認: 0:20:09 時間前の 2021年01月28日 08時17分37秒 に実施しました。
依存関係が解決しました。
==================================================================================================================================================
 パッケージ                         Arch          バージョン                                        リポジトリー                            サイズ
==================================================================================================================================================
インストール:
 podman                             x86_64        2.0.5-5.module+el8.3.0+8221+97165c3f              rhel-8-for-x86_64-appstream-rpms         13 M
依存関係のインストール:
 conmon                             x86_64        2:2.0.20-2.module+el8.3.0+8221+97165c3f           rhel-8-for-x86_64-appstream-rpms         49 k
 containernetworking-plugins        x86_64        0.8.6-2.module+el8.3.0+8221+97165c3f              rhel-8-for-x86_64-appstream-rpms         20 M
 containers-common                  x86_64        1:1.1.1-3.module+el8.3.0+8221+97165c3f            rhel-8-for-x86_64-appstream-rpms         66 k
 criu                               x86_64        3.14-2.module+el8.3.0+8221+97165c3f               rhel-8-for-x86_64-appstream-rpms        500 k
 fuse-overlayfs                     x86_64        1.1.2-3.module+el8.3.0+8221+97165c3f              rhel-8-for-x86_64-appstream-rpms         67 k
 fuse3-libs                         x86_64        3.2.1-12.el8                                      rhel-8-for-x86_64-baseos-rpms            94 k
 libnet                             x86_64        1.1.6-15.el8                                      rhel-8-for-x86_64-appstream-rpms         67 k
 libslirp                           x86_64        4.3.1-1.module+el8.3.0+8221+97165c3f              rhel-8-for-x86_64-appstream-rpms         69 k
 libvarlink                         x86_64        18-3.el8                                          rhel-8-for-x86_64-baseos-rpms            44 k
 podman-catatonit                   x86_64        2.0.5-5.module+el8.3.0+8221+97165c3f              rhel-8-for-x86_64-appstream-rpms        308 k
 protobuf-c                         x86_64        1.3.0-4.el8                                       rhel-8-for-x86_64-appstream-rpms         37 k
 runc                               x86_64        1.0.0-68.rc92.module+el8.3.0+8221+97165c3f        rhel-8-for-x86_64-appstream-rpms        3.7 M
 slirp4netns                        x86_64        1.1.4-2.module+el8.3.0+8221+97165c3f              rhel-8-for-x86_64-appstream-rpms         50 k
弱い依存関係のインストール:
 container-selinux                  noarch        2:2.144.0-1.module+el8.3.0+8221+97165c3f          rhel-8-for-x86_64-appstream-rpms         49 k
モジュールストリームの有効化中:
 container-tools                                  rhel8

トランザクションの概要
==================================================================================================================================================
インストール  15 パッケージ

ダウンロードサイズの合計: 39 M
インストール済みのサイズ: 133 M
これでよろしいですか? [y/N]:
[zaki@rhel8 ~]$ podman version
Version:      2.0.5
API Version:  1
Go Version:   go1.14.7
Built:        Wed Sep 23 12:18:02 2020
OS/Arch:      linux/amd64
インストールされたので一応挨拶。
[zaki@rhel8 kind]$ podman ps -a
CONTAINER ID  IMAGE   COMMAND  CREATED  STATUS  PORTS   NAMES
[zaki@rhel8 kind]$ podman run hello-world
Trying to pull registry.access.redhat.com/hello-world...
  name unknown: Repo not found
Trying to pull registry.redhat.io/hello-world...
  unable to retrieve auth token: invalid username/password: unauthorized: Please login to the Red Hat Registry using your Customer Portal credentials. Further instructions can be found here: https://access.redhat.com/RegistryAuthentication
Trying to pull docker.io/library/hello-world...
Getting image source signatures
Copying blob 0e03bdcc26d7 done
Copying config bf756fb1ae done
Writing manifest to image destination
Storing signatures

Hello from Docker!
This message shows that your installation appears to be working correctly.

To generate this message, Docker took the following steps:
 1. The Docker client contacted the Docker daemon.
 2. The Docker daemon pulled the "hello-world" image from the Docker Hub.
    (amd64)
 3. The Docker daemon created a new container from that image which runs the
    executable that produces the output you are currently reading.
 4. The Docker daemon streamed that output to the Docker client, which sent it
    to your terminal.

To try something more ambitious, you can run an Ubuntu container with:
 $ docker run -it ubuntu bash

Share images, automate workflows, and more with a free Docker ID:
 https://hub.docker.com/

For more examples and ideas, visit:
 https://docs.docker.com/get-started/

[zaki@rhel8 kind]$
[zaki@rhel8 kind]$ podman ps -a
CONTAINER ID  IMAGE                                 COMMAND  CREATED         STATUS                     PORTS   NAMES
8847ed15d8b3  docker.io/library/hello-world:latest  /hello   30 seconds ago  Exited (0) 29 seconds ago          gracious_pare
何も考えずに実行したけど、root権限あるいはグループ設定無くても動くというか、この場合はrootlessモードで動作し、ホストOS上ではpodmanを実行しているユーザーの実行権限で動作する。
Podmanのrootlessモード
Podmanを使ってalpineコンテナでコマンドを実行した場合。
[zaki@rhel8 kind]$ podman run -it alpine sh
Trying to pull registry.access.redhat.com/alpine...
  name unknown: Repo not found
Trying to pull registry.redhat.io/alpine...
  unable to retrieve auth token: invalid username/password: unauthorized: Please login to the Red Hat Registry using your Customer Portal credentials. Further instructions can be found here: https://access.redhat.com/RegistryAuthentication
Trying to pull docker.io/library/alpine...
Getting image source signatures
Copying blob 4c0d98bf9879 done
Copying config e50c909a8d done
Writing manifest to image destination
Storing signatures
/ # id
uid=0(root) gid=0(root)
/ # ps
PID   USER     TIME  COMMAND
    1 root      0:00 sh
    7 root      0:00 ps
/ # tail -f /dev/null
コンテナ内ではuid=0で動いているが、ホストOS上でpsで確認すると、
[zaki@rhel8 kind]$ ps auxf
USER         PID %CPU %MEM    VSZ   RSS TTY      STAT START   TIME COMMAND

...

zaki      405746  0.0  0.0 143748  2664 ?        Ssl  23:17   0:00 /usr/bin/conmon --api-version 1 -c d ...
zaki      405756  0.0  0.0   1660  1004 pts/0    Ss   23:17   0:00  \_ sh
zaki      406164  0.0  0.0   1584     4 pts/0    S+   23:20   0:00      \_ tail -f /dev/null
このように、実行ユーザー権限で動作している。
一方、同じことをDocker(v20.10.2)でやると、
(a2.10) [zaki@cloud-dev ~]$ docker run -it alpine sh
/ # id
uid=0(root) gid=0(root) groups=0(root),1(bin),2(daemon),3(sys),4(adm),6(disk),10(wheel),11(floppy),20(dialout),26(tape),27(video)
/ # tail -f /dev/null
コンテナ内ではPodmanの場合と同じようにuid=0で動いているが、ホストOS上でpsすると、
[zaki@cloud-dev ~]$ ps auxf
USER         PID %CPU %MEM    VSZ   RSS TTY      STAT START   TIME COMMAND

...

root     1699148  0.0  0.0 113244  4900 ?        Sl   13:27   0:00 /usr/bin/containerd-shim-runc-v2 -names ...
root     1699168  0.1  0.0   1636   512 pts/0    Ss   13:27   0:00  \_ sh
root     1699219  0.0  0.0   1560   244 pts/0    S+   13:27   0:00      \_ tail -f /dev/null
root権限で動作している。
(このホスト上では、実行ユーザーはdockerグループに所属させてsudoなしで実行できるように設定している)
kindのインストール
CLIのインストール
kindのインストール自体は通常通り。
[zaki@rhel8 ~]$ mkdir -p local/kind
[zaki@rhel8 ~]$ cd $_
[zaki@rhel8 kind]$
[zaki@rhel8 kind]$ curl -Lo ./kind https://kind.sigs.k8s.io/dl/v0.9.0/kind-linux-amd64
  % Total    % Received % Xferd  Average Speed   Time    Time     Time  Current
                                 Dload  Upload   Total   Spent    Left  Speed
100    97  100    97    0     0    243      0 --:--:-- --:--:-- --:--:--   243
100   642  100   642    0     0    825      0 --:--:-- --:--:-- --:--:--  1893
100 7247k  100 7247k    0     0   928k      0  0:00:07  0:00:07 --:--:-- 1408k
[zaki@rhel8 kind]$ chmod +x ./kind
[zaki@rhel8 kind]$ sudo mv ./kind /usr/local/bin/
[zaki@rhel8 kind]$
[zaki@rhel8 kind]$ kind version
kind v0.9.0 go1.15.2 linux/amd64
K8sクラスタのデプロイ
せっかくなのでマルチノードで。
[zaki@rhel8 kind]$ cat multinode.yaml
# three node (two workers) cluster config
kind: Cluster
apiVersion: kind.x-k8s.io/v1alpha4
nodes:
- role: control-plane
- role: worker
- role: worker
これをパラメタに、
KIND_EXPERIMENTAL_PROVIDER=podman kind create cluster --config multinode.yamlを実行…できればよかったんだけど、
[zaki@rhel8 kind]$ KIND_EXPERIMENTAL_PROVIDER=podman kind create cluster --config multinode.yaml
using podman due to KIND_EXPERIMENTAL_PROVIDER
enabling experimental podman provider
Creating cluster "kind" ...
podman provider does not work properly in rootless mode
Podmanのrootlessモードだとkindは動作しない模様。。
ということで、「『kindを使う場合は』podman実行時にroot権限が必要」という解釈でいいのかな?sudo付けて実行してみる。
[zaki@rhel8 kind]$ sudo KIND_EXPERIMENTAL_PROVIDER=podman kind create cluster --config multinode.yaml
using podman due to KIND_EXPERIMENTAL_PROVIDER
enabling experimental podman provider
Creating cluster "kind" ...
 ✓ Ensuring node image (kindest/node:v1.19.1) 🖼
 ✓ Preparing nodes 📦 📦 📦
 ✓ Writing configuration 📜
 ✓ Starting control-plane 🕹️
 ✓ Installing CNI 🔌
 ✓ Installing StorageClass 💾
 ✓ Joining worker nodes 🚜
Set kubectl context to "kind-kind"
You can now use your cluster with:

kubectl cluster-info --context kind-kind

Have a question, bug, or feature request? Let us know! https://kind.sigs.k8s.io/#community 🙂
OKです。
自動生成されるクレデンシャル情報ファイル(kubeconfigファイル)は、sudoでrootユーザーで動作した影響でrootの$HOME/.kube/configにあるので、通常ユーザーの$HOME/.kube/configにもクレデンシャル情報を作成する。
[zaki@rhel8 kind]$ mkdir ~/.kube
[zaki@rhel8 kind]$ sudo kind get kubeconfig > ~/.kube/config
enabling experimental podman provider
あ、これもしかしてKIND_EXPERIMENTAL_PROVIDER=podmanは設定しなくても自動認識するのかも?(未確認)
[zaki@rhel8 kind]$ kubectl get node -o wide
NAME                 STATUS   ROLES    AGE    VERSION   INTERNAL-IP   EXTERNAL-IP   OS-IMAGE                                     KERNEL-VERSION                 CONTAINER-RUNTIME
kind-control-plane   Ready    master   2m3s   v1.19.1   10.88.0.12    <none>        Ubuntu Groovy Gorilla (development branch)   4.18.0-240.10.1.el8_3.x86_64   containerd://1.4.0
kind-worker          Ready    <none>   90s    v1.19.1   10.88.0.13    <none>        Ubuntu Groovy Gorilla (development branch)   4.18.0-240.10.1.el8_3.x86_64   containerd://1.4.0
kind-worker2         Ready    <none>   90s    v1.19.1   10.88.0.11    <none>        Ubuntu Groovy Gorilla (development branch)   4.18.0-240.10.1.el8_3.x86_64   containerd://1.4.0
できました。
Bookinfo
クラスターが動いてることの確認といえばWordPressあたりが妥当だけど、せっかく(何がせっかくなんだろう)なので、MetalLBとIstio入れてBookinfoをデプロイしてみる。
Istioの動作にMetalLB(type:LoadBalancer Service)は必須ではないけど、デフォルトでデプロイされるIngressGateway Serviceがtype:LoadBalancerに設定されてるので、用意されてるものをそのまま動くようにするために使う感じ。
MetalLB
以前もやってるし、手順は同じ。
ただし、2021.01.30時点で、バージョン v0.9.5 になってる。
まず本体のデプロイのため以下実行。
kubectl apply -f https://raw.githubusercontent.com/metallb/metallb/v0.9.5/manifests/namespace.yaml
kubectl apply -f https://raw.githubusercontent.com/metallb/metallb/v0.9.5/manifests/metallb.yaml
# On first install only
kubectl create secret generic -n metallb-system memberlist --from-literal=secretkey="$(openssl rand -base64 128)"
次にtype:LoadBalancer Serviceに割り当てるIPアドレスの設定。
…さて、そういえばPodmanで動いてるコンテナのIPアドレスってどうなってるんだろう?
使用状況はDockerと同じくpodman inspectで確認できた。
[zaki@rhel8 kind]$ sudo podman ps --quiet | sudo xargs podman inspect -f "{{.Name}} {{.NetworkSettings.IPAddress }}"
kind-worker2         10.88.0.11
kind-worker          10.88.0.13
kind-control-plane   10.88.0.12
使用中のコンテナネットワークは以下。
[zaki@rhel8 kind]$ sudo podman network ls
NAME    VERSION  PLUGINS
podman  0.4.0    bridge,portmap,firewall,tuning
サブネット(sudo podman network inspect podmanの該当箇所)を取り出すと、
[zaki@rhel8 kind]$ sudo podman network inspect podman -f '{{(index (index (index .plugins 0).ipam.ranges 0) 0).subnet}}'
10.88.0.0/16
こんな感じ?
(Go Templateぜんぜんわからん。特に配列)
/16なんで第3オクテットを大きい値にしておけばよさげ。(適当です)
apiVersion: v1
kind: ConfigMap
metadata:
  namespace: metallb-system
  name: config
data:
  config: |
    address-pools:
    - name: default
      protocol: layer2
      addresses:
      - 10.88.250.10-10.88.250.20
この内容でConfigMap作成。
[zaki@rhel8 metallb]$ sudo kubectl apply -f config.yaml
configmap/config created
これでtype:LoadBalancer Serviceをデプロイしたときに、ここで設定したIPアドレスが自動でExternal-IPに割り当てられる。
Istio
Istioのインストールも以前やったときとほぼ同じ。
2021.01.30時点でバージョンは1.8.2になっている。
[zaki@rhel8 istio]$ curl -L https://istio.io/downloadIstio | sh -
  % Total    % Received % Xferd  Average Speed   Time    Time     Time  Current
                                 Dload  Upload   Total   Spent    Left  Speed
100   102  100   102    0     0    228      0 --:--:-- --:--:-- --:--:--   228
100  4579  100  4579    0     0   5536      0 --:--:-- --:--:-- --:--:-- 37227

Downloading istio-1.8.2 from https://github.com/istio/istio/releases/download/1.8.2/istio-1.8.2-linux-amd64.tar.gz ...

Istio 1.8.2 Download Complete!

Istio has been successfully downloaded into the istio-1.8.2 folder on your system.

Next Steps:
See https://istio.io/latest/docs/setup/install/ to add Istio to your Kubernetes cluster.

To configure the istioctl client tool for your workstation,
add the /home/zaki/local/istio/istio-1.8.2/bin directory to your environment path variable with:
         export PATH="$PATH:/home/zaki/local/istio/istio-1.8.2/bin"

Begin the Istio pre-installation check by running:
         istioctl x precheck

Need more information? Visit https://istio.io/latest/docs/setup/install/
istioctlを/usr/local/binに配置。
[zaki@rhel8 istio]$ sudo cp -a istio-1.8.2/bin/istioctl /usr/local/bin/
[zaki@rhel8 istio]$
[zaki@rhel8 istio]$ istioctl version
no running Istio pods in "istio-system"
1.8.2
demoプロファイルでインストール。
[zaki@rhel8 istio]$ istioctl install --set profile=demo -y
Detected that your cluster does not support third party JWT authentication. Falling back to less secure first party JWT. See https://istio.io/v1.8/docs/ops/best-practices/security/#configure-third-party-service-account-tokens for details.
✔ Istio core installed
✔ Istiod installed
✔ Egress gateways installed
✔ Ingress gateways installed
✔ Installation complete
[zaki@rhel8 istio]$ kubectl get pod,svc -n istio-system
NAME                                        READY   STATUS    RESTARTS   AGE
pod/istio-egressgateway-c9c55457b-tpj6k     1/1     Running   0          3m6s
pod/istio-ingressgateway-865d46c7f5-9gsc6   1/1     Running   0          3m6s
pod/istiod-7f785478df-svc62                 1/1     Running   0          3m39s

NAME                           TYPE           CLUSTER-IP      EXTERNAL-IP    PORT(S)                                                                      AGE
service/istio-egressgateway    ClusterIP      10.96.125.248   <none>         80/TCP,443/TCP,15443/TCP                                                     3m6s
service/istio-ingressgateway   LoadBalancer   10.96.221.246   10.88.250.10   15021:32424/TCP,80:30905/TCP,443:32177/TCP,31400:31323/TCP,15443:31192/TCP   3m6s
service/istiod                 ClusterIP      10.96.29.215    <none>         15010/TCP,15012/TCP,443/TCP,15014/TCP                                        3m38s
デプロイできました。
(type:LoadBalancerが設定されているIstio IngressGatewayも設定どおり10.88.250.*のアドレスが付いている)
Bookinfo本体
namespaceとlabel設定
[zaki@rhel8 istio]$ kubectl create namespace bookinfo
namespace/bookinfo created
[zaki@rhel8 istio]$ kubectl label namespaces bookinfo istio-injection=enabled
namespace/bookinfo labeled
Bookinfoのデプロイ
[zaki@rhel8 istio]$ kubectl apply -f istio-1.8.2/samples/bookinfo/platform/kube/bookinfo.yaml -n bookinfo
service/details created
serviceaccount/bookinfo-details created
deployment.apps/details-v1 created
service/ratings created
serviceaccount/bookinfo-ratings created
deployment.apps/ratings-v1 created
service/reviews created
serviceaccount/bookinfo-reviews created
deployment.apps/reviews-v1 created
deployment.apps/reviews-v2 created
deployment.apps/reviews-v3 created
service/productpage created
serviceaccount/bookinfo-productpage created
deployment.apps/productpage-v1 created
[zaki@rhel8 istio]$ kubectl get pod -n bookinfo
NAME                              READY   STATUS            RESTARTS   AGE
details-v1-79c697d759-kllz9       0/2     PodInitializing   0          25s
productpage-v1-65576bb7bf-w7h79   0/2     Init:0/1          0          24s
ratings-v1-7d99676f7f-kschh       0/2     Init:0/1          0          25s
reviews-v1-987d495c-59hh6         0/2     PodInitializing   0          25s
reviews-v2-6c5bf657cf-l6q49       0/2     PodInitializing   0          25s
reviews-v3-5f7b9f4f77-q2wnn       0/2     Init:0/1          0          25s
この通りデプロイが始まるのでしばらく待つ。
(数十秒レベルでは完了せず、5分近く時間かかった)
[zaki@rhel8 istio]$ kubectl get pod -n bookinfo
NAME                              READY   STATUS            RESTARTS   AGE
details-v1-79c697d759-kllz9       2/2     Running           0          4m10s
productpage-v1-65576bb7bf-w7h79   0/2     PodInitializing   0          4m9s
ratings-v1-7d99676f7f-kschh       0/2     PodInitializing   0          4m10s
reviews-v1-987d495c-59hh6         2/2     Running           0          4m10s
reviews-v2-6c5bf657cf-l6q49       1/2     Running           0          4m10s
reviews-v3-5f7b9f4f77-q2wnn       0/2     PodInitializing   0          4m10s
[zaki@rhel8 istio]$ kubectl get pod -n bookinfo
NAME                              READY   STATUS    RESTARTS   AGE
details-v1-79c697d759-kllz9       2/2     Running   0          5m2s
productpage-v1-65576bb7bf-w7h79   2/2     Running   0          5m1s
ratings-v1-7d99676f7f-kschh       2/2     Running   0          5m2s
reviews-v1-987d495c-59hh6         2/2     Running   0          5m2s
reviews-v2-6c5bf657cf-l6q49       2/2     Running   0          5m2s
reviews-v3-5f7b9f4f77-q2wnn       2/2     Running   0          5m2s
全Podが2/2でRunningになったのを確認。
外部アクセス設定(Gateway + VirtualService)
[zaki@rhel8 istio]$ kubectl apply -f istio-1.8.2/samples/bookinfo/networking/bookinfo-gateway.yaml -n bookinfo
gateway.networking.istio.io/bookinfo-gateway created
virtualservice.networking.istio.io/bookinfo created
HTTPアクセス
[zaki@rhel8 istio]$ curl http://10.88.250.10/productpage
<!DOCTYPE html>
<html>
  <head>
    <title>Simple Bookstore App</title>
<meta charset="utf-8">
<meta http-equiv="X-UA-Compatible" content="IE=edge">
<meta name="viewport" content="width=device-width, initial-scale=1.0">
:
:
アクセスOK
ただしこの10.88.0.0/16、Podmanのネットワーク上のアドレスなので、ホストOSの外部からはアクセスできない。
外からアクセスしたい場合、DockerやPodman単体であれば-pでポートをpublishすればポートフォワードされるけど、kindの場合はextraPortMappingsを使えば良い。
が、今回この設定は入れなかったので、sshのポートフォワードで回避。
ブラウザを使うローカルPCからkindを動かしているホスト(ここではrhel8というホスト)へ-L ローカルでlistenするポート:リモート上でアクセスするホスト:リモート上でアクセスするポートを追加してsshログイン。
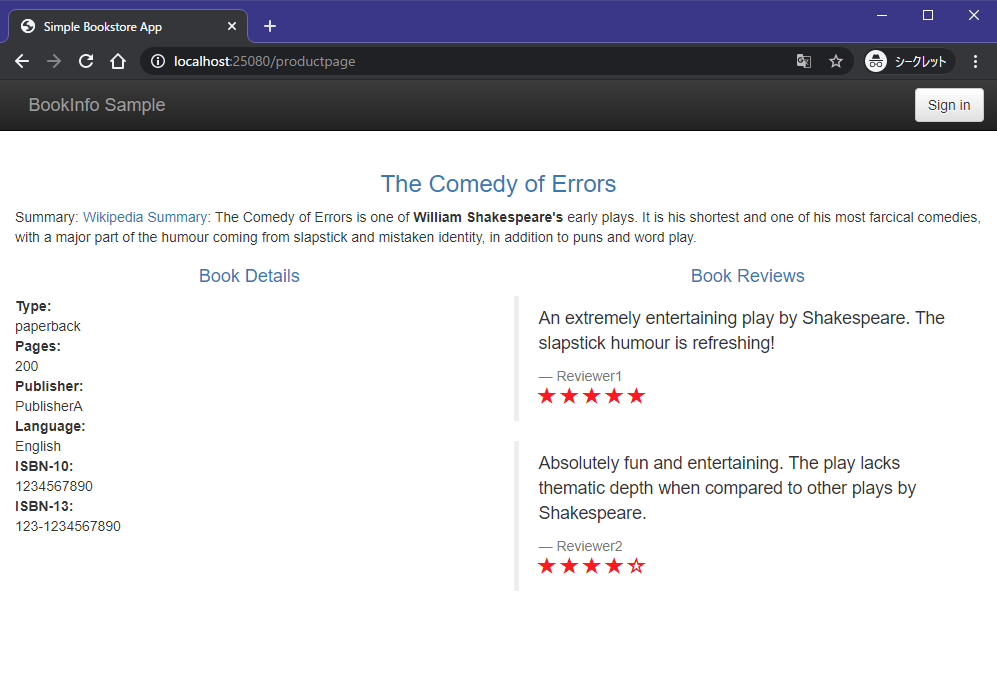
PS C:\Users\zaki> ssh rhel8 -L 25080:10.88.250.10:80
Activate the web console with: systemctl enable --now cockpit.socket

This system is not registered to Red Hat Insights. See https://cloud.redhat.com/
To register this system, run: insights-client --register

Last login: Sat Jan 30 01:35:15 2021 from 192.168.0.10
[zaki@rhel8 ~]$
この状態で、ブラウザでhttp://localhost:25080/productpageにアクセス。
(パスの/productpageはBookinfoのVirtualServiceによるもの)
関連情報
www.slideshare.net